Squarespace 101 - Beginner's Guide to Blogging
So you have your Squarespace website up and running but not sure where to begin with blogging? This post has you covered on how to publish posts and explains what you should be doing behind the scenes of your posts.
Add a blog post
Once you're logged into your site, click on your blog page and add a new blog post by clicking the + icon.

Type your title and body of your blog
The blog post editor will appear. You will be able to enter the title of your post, then type the body of your post directly into the blog post editor.
Pro Tip: Type out your blog posts in Word or Google Docs beforehand. This way, you can just copy and paste it into the post editor and you won’t have to worry about losing your blog post if… say the internet suddenly goes. And plus, It never hurts to have a backup copy of your posts.
Add a photo or more content
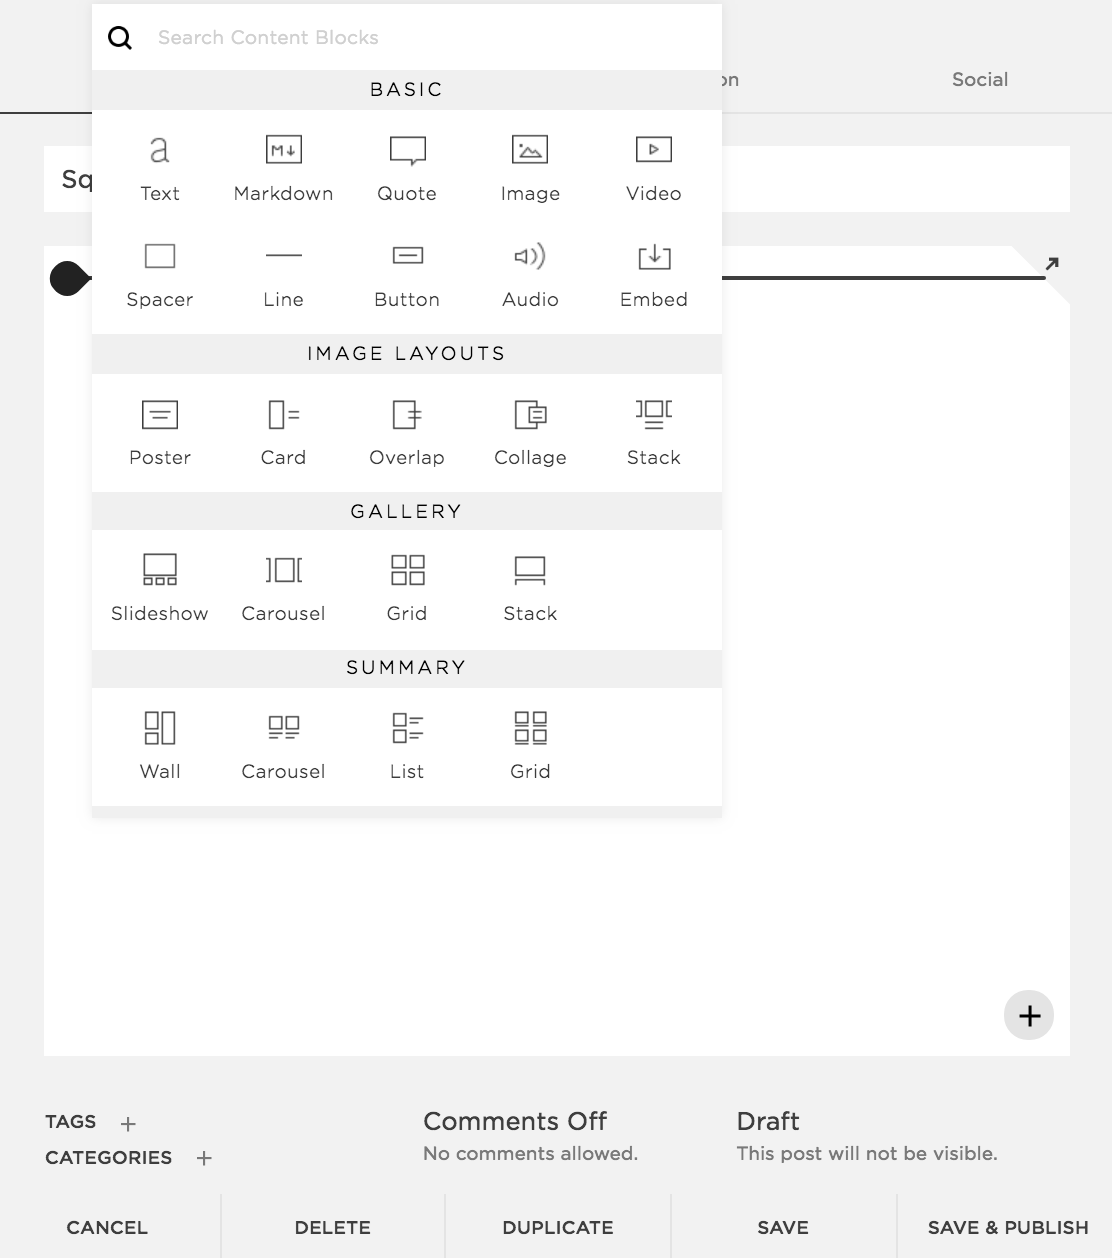
If you would like to add more content to your post - a photo for example - you can use the Insert Point. To find an Insert Point all you need to do it hover over the left side of the blog post editor.

Click the Insert Point and a popup will appear with all sorts of content blocks to add.
Add tags and categories
Tags help describe your post. For example, for this post you are reading right now, my tags might be “Blogging, Squarespace, Website Design, Posts, Tags, Categories”. These can be different for each post.
Categories, on the other hand, help organize your content. My category for this post is “Squarespace”. If someone wants to see all of my posts about Squarespace, they can simply click the Squarespace category on a post to view other posts about Squarespace.
Here’s another example that should clarify tags and categories. Say you have food blog… your categories might be Drinks, Meals, and Sweets. If you have a cupcake recipe post, you would use the Sweets category and your tags might be Dessert, Cupcakes, Chocolate, Cream Cheese, Icing, Sprinkles.

Comments
You have the option to either turn comments on or off. If you want turn comments on, you will first have to enable comments in Comment Settings. You’ll have to go back to the Home Menu, click Settings, click Blogging, and then click Comments Settings.

Options
At the top of the post editor, you can click Options which is where you can upload a thumbnail photo. This photo, depending on your template, can appear on the homepage of your blog.
In the options panel, you also have the capability to create a custom URL, select the author, and provide an excerpt, which is also something that can appear on the homepage of your blog.

Location
To the right of Options, you can click Location, where you are able to specify the location of your post.

Social
The Social section is where you can push content on your social media platforms. However, first you will need to connect your social accounts.

Publish
When you’re finished editing a post, you can either Save (which will save the post as a draft), or Save & Publish (which will publish the blog).
For a more detailed post about blogging with Squarespace, check out this link.